Your team spends weeks on the event page. The agenda is right, the speaker photos are sharp, the copy finally sounds like your brand. Then a visitor clicks “Register” and lands on a page with a different header, a different URL and a different look. Some people carry on. Some stop to wonder whether they are still on the right site.
Embedding your event registration form solves that moment. Instead of sending visitors to a separate landing page, you place the ticket list and registration form directly inside a page on your own website, using a short piece of code from your registration platform. Visitors read about the event and sign up in the same place, and the registration data still flows into your event system.
This guide covers how an embedded form compares with a hosted landing page, when each one makes sense, the four ways to put Gevme Registration on your website, how to choose between a script and an iFrame embed, a step-by-step setup, tracking, and fixes for the problems teams run into most often.
Key Takeaways
- An embedded event registration form lets visitors sign up on your own website, so your branding, navigation and page content stay in front of them through checkout.
- A hosted landing page is still the faster option when you have no access to your website, a short timeline, or a site that blocks embedded code.
- Gevme Registration offers four website integration options: a tickets widget, a call-to-action button, a text link and a calendar widget for multiple events.
- The tickets widget comes in two embed types, script and iFrame, and the iFrame is the safer choice on website builders that strip scripts.
- Finish setting up tickets, forms, payments and confirmation emails in Gevme before you copy the embed code, then run a full test registration on desktop and mobile.
- Use Gevme’s Google Analytics, Google Tag Manager and UTM tracking on the registration side, because your website’s own tags can’t see inside an embedded frame.
Embedded Form or Separate Landing Page: What Changes
Both approaches collect the same registrations into the same system. What changes is where the visitor is when they sign up, and how much work it takes to get there.
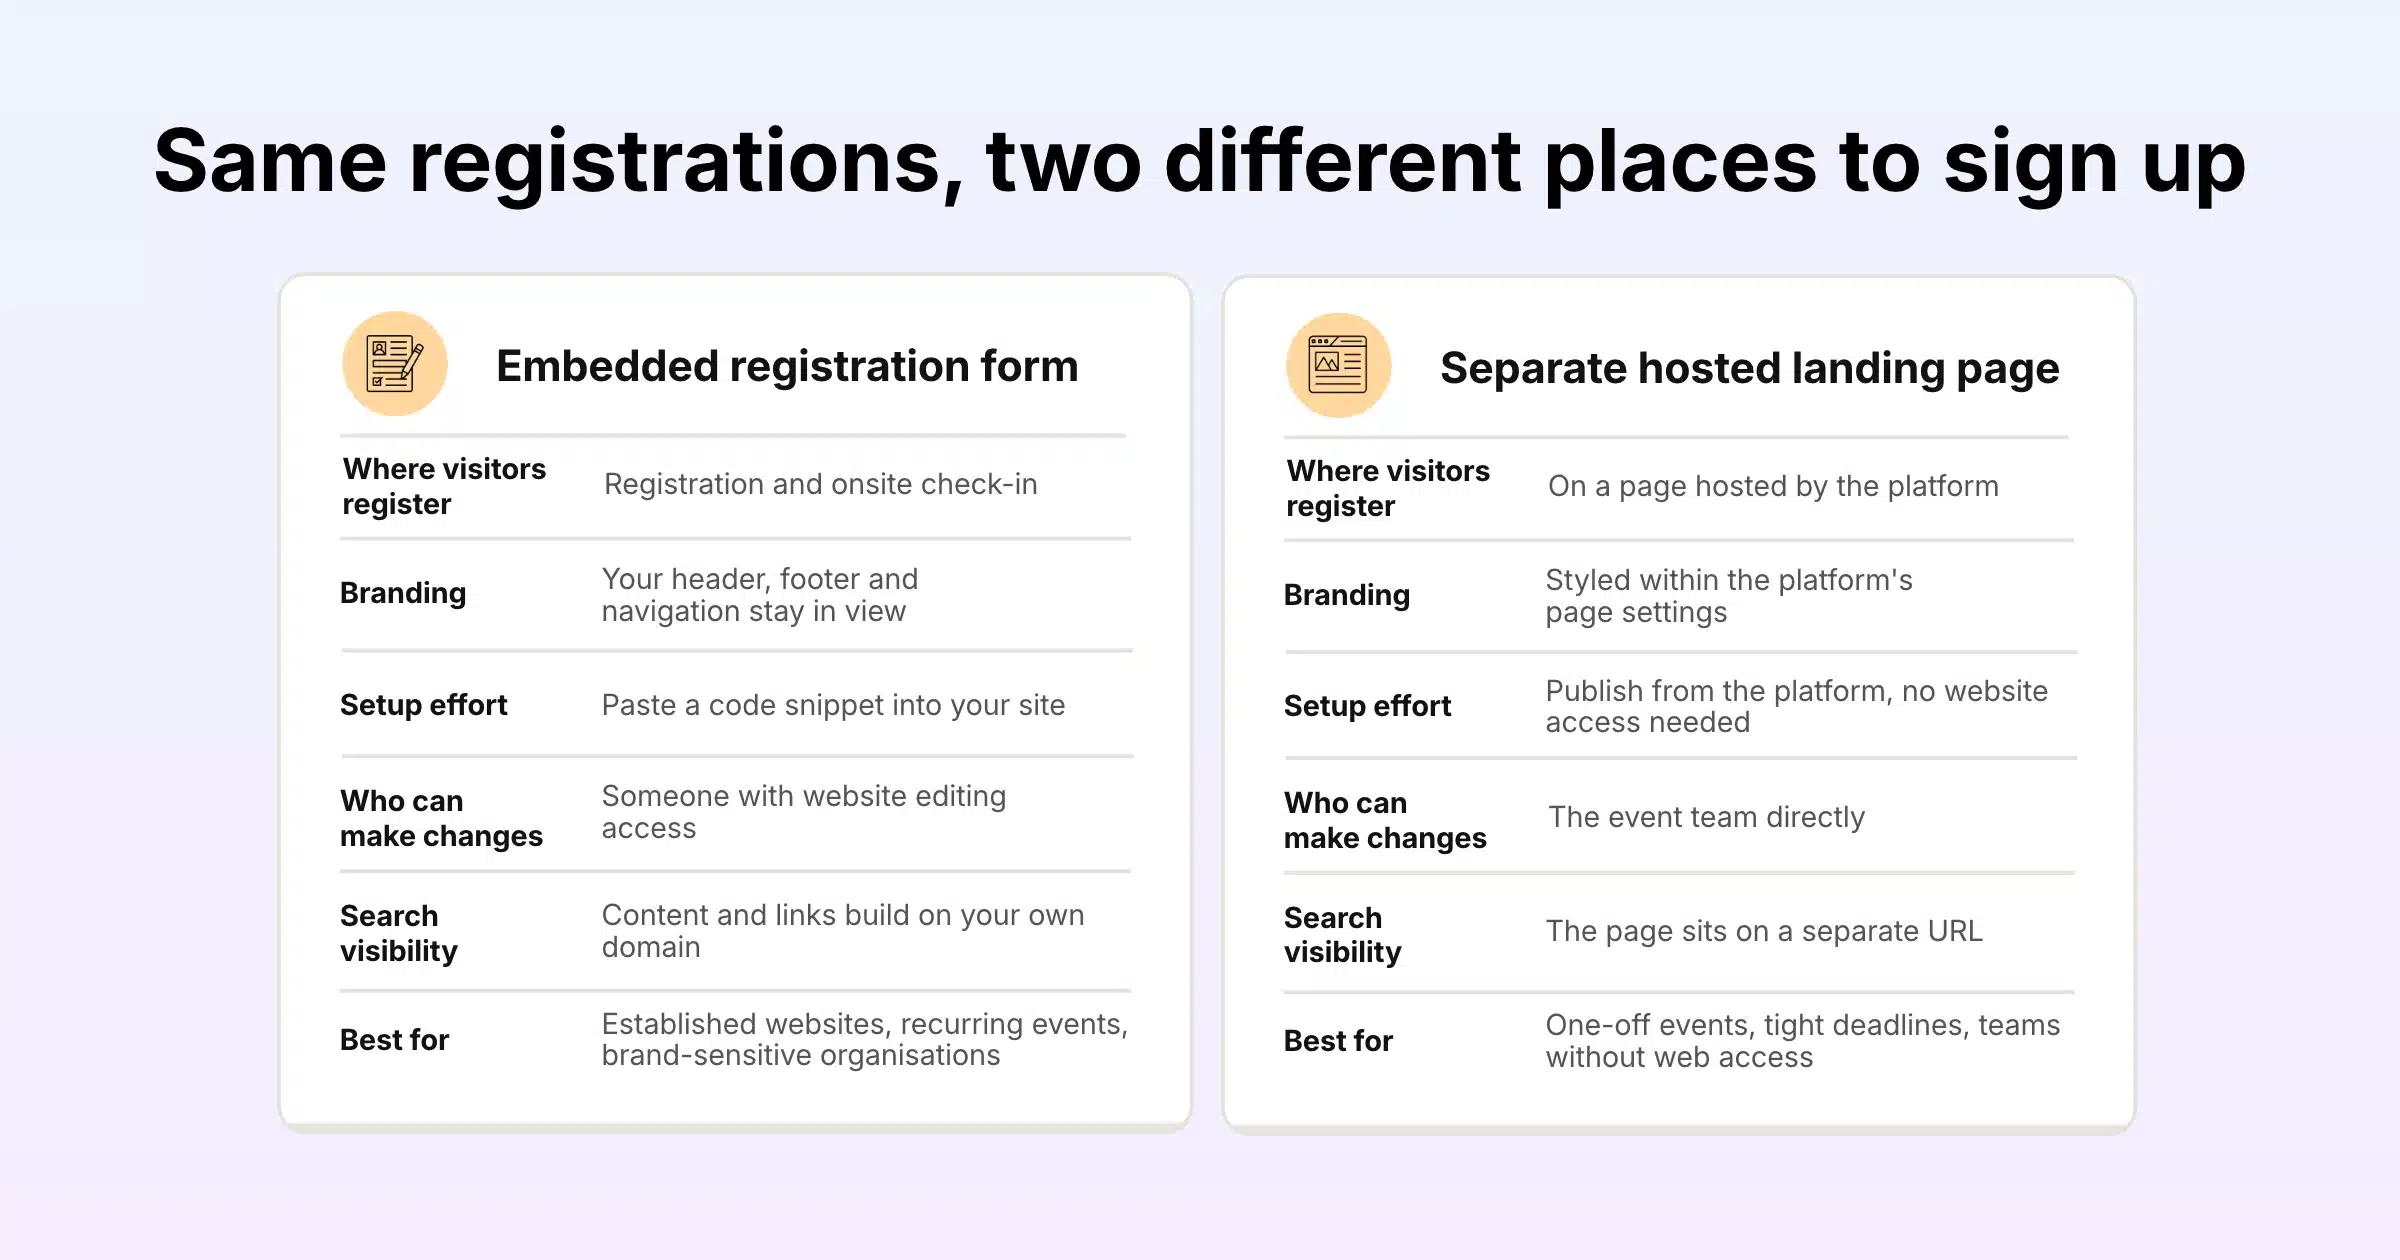
| Factor | Embedded registration form | Separate hosted landing page |
|---|---|---|
| Where visitors register | On a page of your own website | On a page hosted by the registration platform |
| Branding | Your site’s header, footer, fonts and navigation stay in view | Styled within the platform’s page settings |
| Setup effort | Copy and paste a code snippet into your site | Publish the page from the platform, no website access needed |
| Who can make changes | Usually needs someone with website editing access | The event team can update it directly |
| Search visibility | The event content and its links build up on your own domain | The landing page sits on a separate URL |
| Ticket updates | Ticket changes made in the platform show in the widget | Ticket changes show on the page |
| Best for | Established websites, recurring events, brand-sensitive organisations | One-off events, tight deadlines, teams without web access |
Neither option is wrong. Many organisers use both: an embedded form on the main website, plus a hosted page or text link for email campaigns and social posts.
When Embedding Makes Sense
Your Website Already Gets the Traffic
If people already visit your site for news, resources or member content, the event page is where they will look first. Keeping registration on that page means visitors don’t have to leave to sign up, and every visit counts in your own website analytics.
You Run a Series of Events
Associations, universities and training providers often run dozens of events a year. Embedding a calendar of upcoming events on one page gives visitors a single place to browse and register, and your web team doesn’t need to build a new page for each date.
Brand Consistency Matters to Your Audience
Government agencies, banks, associations and large corporates often have strict brand rules, and their audiences notice when something looks off. An embedded form keeps the official website frame around the whole sign-up process, which reassures people who are cautious about where they enter personal and payment details.
You Are Running Campaigns to Specific Pages
If your paid ads or email campaigns point to a page on your own site, an embedded form shortens the path from click to registration by one page. That is one less load, one less moment of doubt, and one less place where a visitor can drop off.
When a Hosted Page Is the Better Choice
You Don’t Have Access to the Website
Some event teams have to file a request with IT or an agency for every website change. If that takes two weeks and your sales open on Monday, publish a hosted registration page first and embed later.
The Event Is a One-Off With a Short Timeline
A single workshop announced to an internal mailing list doesn’t need a new page on the corporate website. A hosted page is ready in minutes.
Your Website Platform Restricts Code
Some content management systems and website builders block custom scripts or iFrames for security reasons. Check with whoever manages your website before promising an embedded form to stakeholders.
You Want a Full Event Website
For larger conferences, the event often needs more than a registration form: an agenda, speaker profiles, sponsor pages and sometimes a virtual venue. Gevme’s event website builder gives you a no-code site on your own custom domain, with registration connected, so the whole event lives on one branded site without touching your main website.
Four Ways to Put Gevme Registration on Your Website
Gevme Registration has a Website Integration section in the left-hand navigation of each event. From there you choose the option that fits your page.
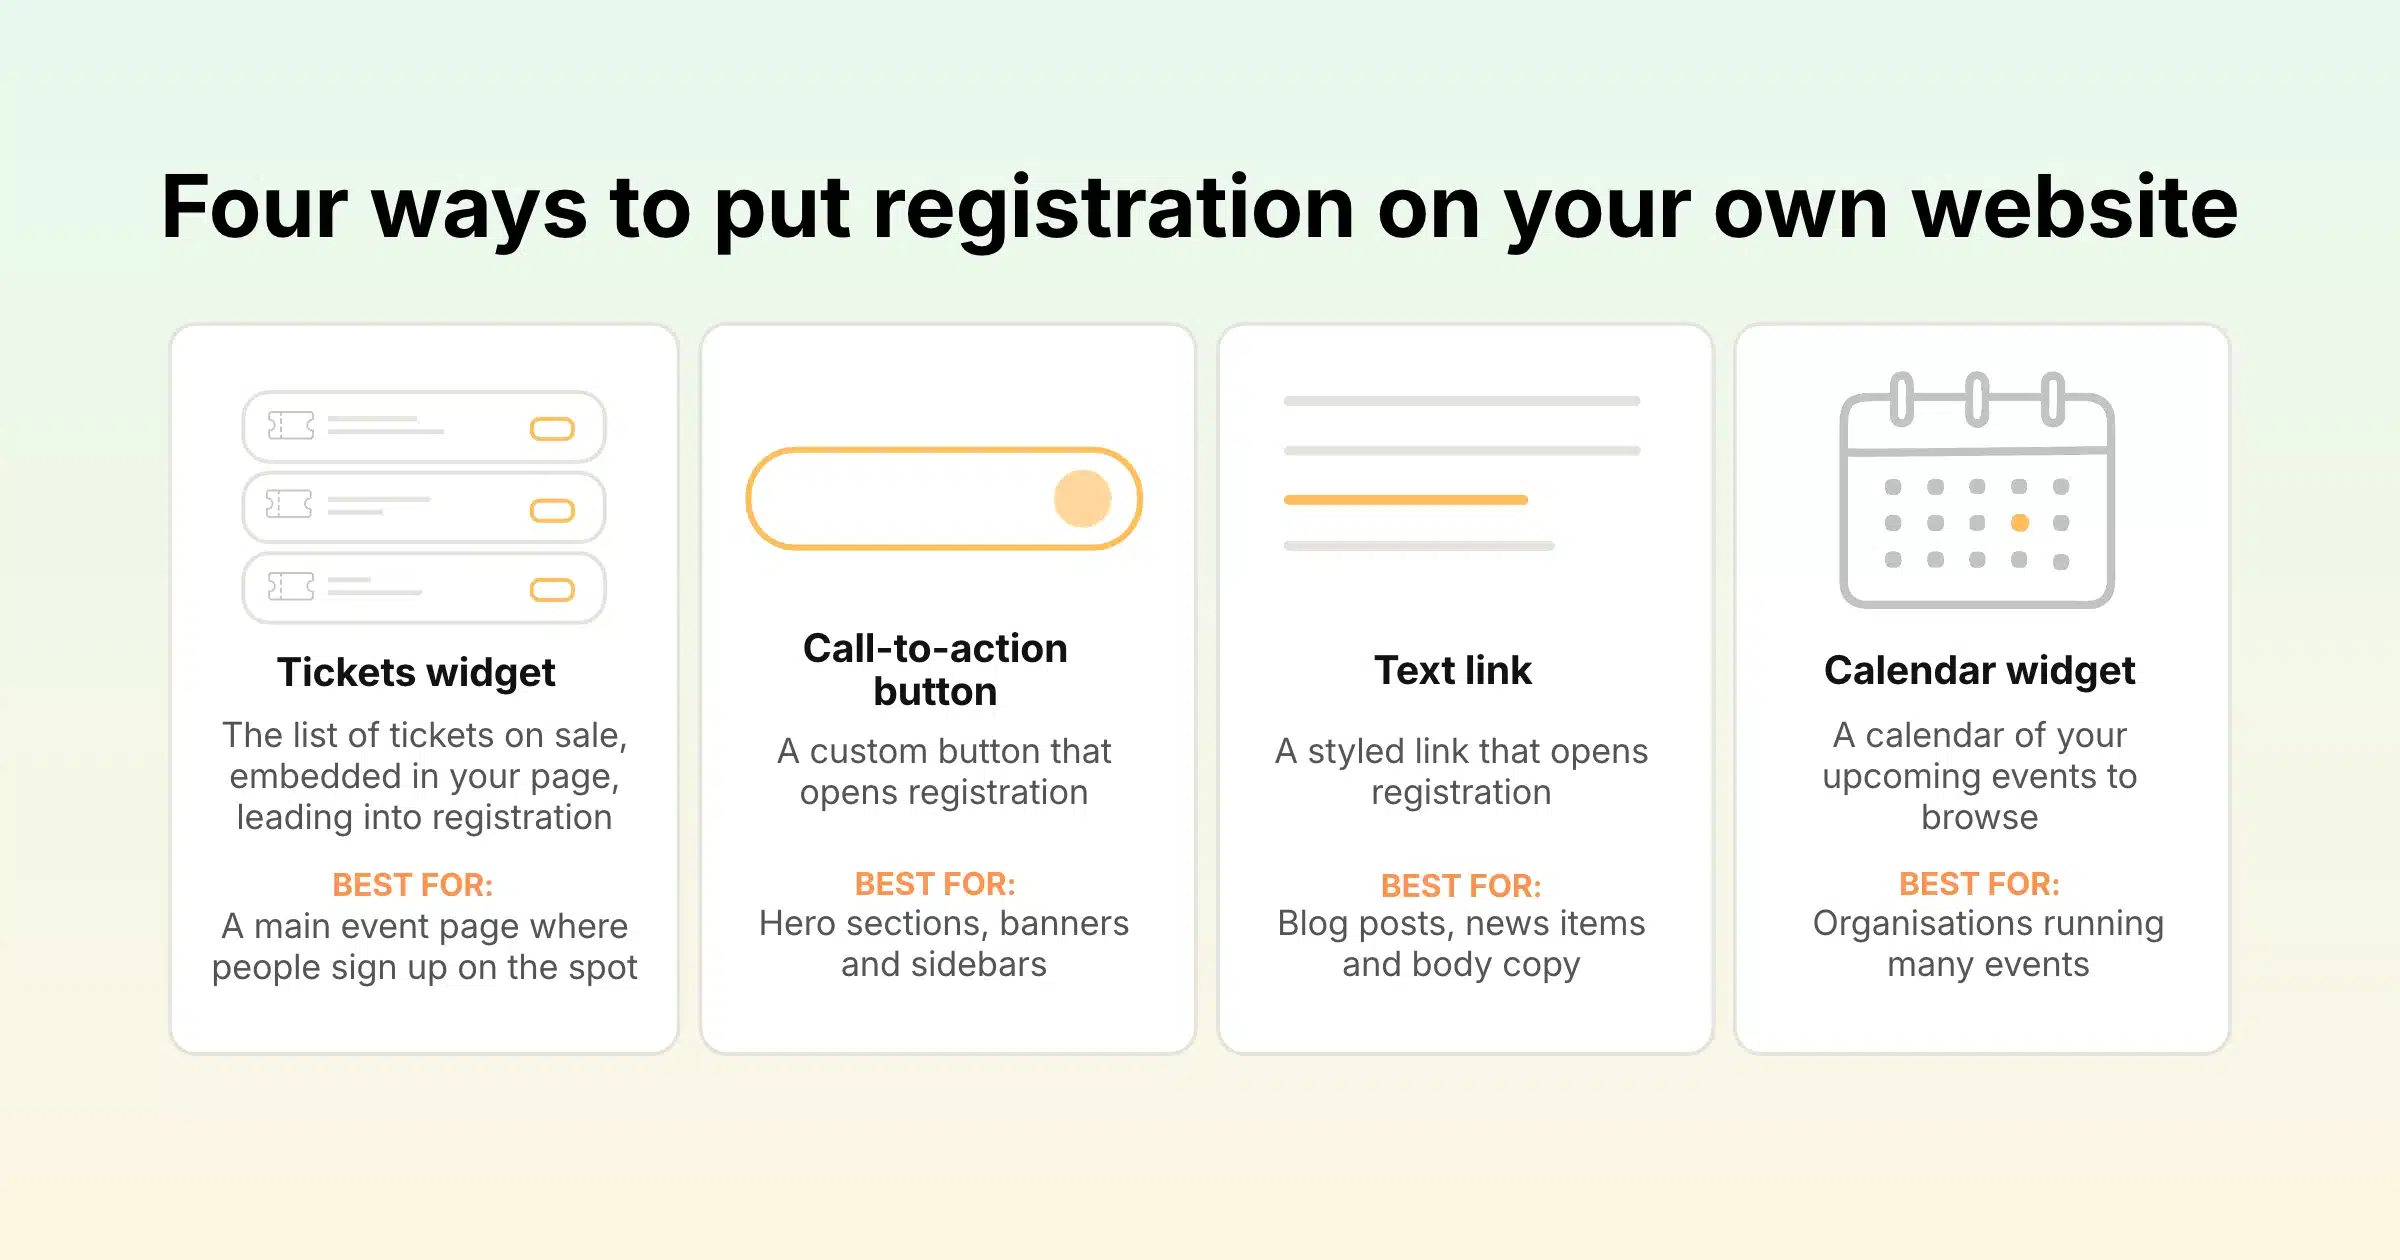
| Option | What visitors see | Best used for |
|---|---|---|
| Tickets widget | The list of tickets on sale, embedded in your page, leading into registration | A main event page where people sign up on the spot |
| Call-to-action button | A custom button that opens registration | Hero sections, banners and sidebars |
| Text link | A styled link that opens registration | Blog posts, news items and body copy |
| Calendar widget | A calendar of your upcoming events to browse | Organisations running many events |
The Tickets Widget
The tickets widget lists all the tickets that are on sale for your event directly on your page. Click Embed, choose the embed type that suits your website (script or iFrame), copy the widget code and paste it into your page. Because the widget lists what is on sale in Gevme, tickets that you hide or take off sale in Gevme also come off the widget.
The Call-to-Action Button
Click Create, then Edit button to style it. You can set the button text, the background colour, the font size, and whether to show a variation of the Gevme logo. Copy the button code and paste it wherever you want a clear “Register now” or “Get tickets” action.
The Text Link
Click Create, then Edit link to set the link text, font size and colour. Copy the link code into your page. Text links work well inside articles, where a full widget would interrupt the reading.
The Calendar Widget
Click Embed, customise the widget, then copy the code into your page. Visitors can view and browse your upcoming events and pick the one they want. For organisations with a busy programme, this one embed can replace a manually updated events page.
Gevme’s website integration guide shows each option with screenshots.
Script or iFrame: Choosing the Right Embed Type
The tickets widget gives you two embed types. Both show the same tickets. The difference is how the code sits inside your page.
| Script embed | iFrame embed | |
|---|---|---|
| How it works | A JavaScript snippet loads the widget into your page | A frame displays the registration content inside your page, like a window |
| Works when your site blocks scripts | No | Yes, on most platforms |
| Height and layout | Fits into the page flow | Has a set frame size that you may need to adjust |
| Typical use | Sites where you or your developer can add scripts | Website builders and CMS editors that strip scripts |
A simple rule: try the script first if your website allows it. If the widget doesn’t appear after you publish, or your editor removes the code when you save, switch to the iFrame version.
How to Embed Your Registration Form, Step by Step
Step 1: Finish the Registration Setup in Gevme
Set up your tickets, forms, payment methods and confirmation emails before you embed anything (the next section has a checklist). The embed shows whatever is live, so a half-finished setup goes live with it.
Step 2: Open Website Integration
In your event in Gevme Registration, click Website Integration in the left-hand navigation and choose the tickets widget, button, text link or calendar widget.
Step 3: Copy the Code
For the tickets widget, click Embed and choose script or iFrame. For the button or text link, click Create and adjust the style. Copy the code Gevme gives you.
Step 4: Paste It Into Your Page
In WordPress, add a Custom HTML block where you want the form and paste the code into it. Most other website builders have a similar HTML, code or embed block. Save the page as a draft first if your platform allows previews.
Step 5: Publish and Test
Open the published page on a laptop and on a phone. Check that the tickets appear, that the form loads, and that the layout doesn’t break at narrow widths. Then complete a full test registration (paid, if your event is paid) and confirm the confirmation email and e-ticket arrive.
Step 6: Add Tracking and Promote
Add UTM parameters to every link that points to the page, and check that registrations appear in your reports with the right source. Then share the page.
Set Up the Form Before You Embed It
An embedded form is only as good as the registration behind it. Run through this checklist in Gevme Registration first.
Registration type. Choose a Registration Form for free events with one attendee per sign-up, Tickets for multiple ticket categories, paid tickets and group bookings, or RSVP for invitation-only events.
Tickets. Set each ticket’s price, quantity, sales start and end dates, and visibility. Tickets can be set to auto-hide when they are not on sale, so the widget never shows an early bird ticket after its deadline. Set minimum and maximum tickets per order and the overall event capacity.
Forms. Build attendee and buyer forms with compulsory fields, fields shown only for certain ticket types, and conditional follow-up questions. Use a unique-value field, such as email, to block duplicate registrations. Returning attendees and invitees can see pre-filled fields, which shortens the form for people you already know.
Discounts. Create promo codes for fixed amounts, percentages or special prices, and access codes that open hidden or VIP tickets. Promo URLs apply a code automatically, which pairs well with an embedded page that you promote through partners.
Payments. Connect one of more than 20 payment gateways, including Stripe, Adyen and PayPal, or regional options such as eNETS. Add bank transfer, cheque or pay at the event if your buyers need them, or use Gevme Pay if you don’t have your own gateway account.
Confirmation. Gevme sends an automated confirmation email to the buyer and each ticket holder, with a PDF e-ticket carrying a unique QR code. Invoices and receipts can be attached to the same email, and e-tickets are stored in Gevme Wallet.
Language. Event pages can run in English or Simplified Chinese.
Tracking Registrations From an Embedded Form
When a form sits inside an iFrame, the registration content loads from the registration platform’s own address. Your website’s analytics tags record the visit to your page, but they can’t see the clicks and form steps that happen inside the frame. Set up tracking on the registration side as well.
Gevme Registration integrates with Google Analytics and Google Tag Manager, and stores UTM and source values with each order. That means you can see which campaign, partner or page brought each registration in, even when the visitor signed up through an embedded widget. Gevme also provides a confirmation page data layer for conversion tracking, so your ads team can count completed registrations as conversions. Partner-linked promo codes add one more layer by tracking registrations per partner.
If attendee data needs to go further, into a CRM or an email marketing tool, Gevme’s integrations cover native connections, Zapier, webhooks and an API.
Page Design Tips for an Embedded Registration Page
Put the form near the top. Give a short summary of the event first: what it is, when, where and who it’s for. Then show the tickets. Detailed agenda and speaker sections can sit below the form, with a second button further down the page.
Keep one main action. Remove competing buttons such as “Subscribe to our newsletter” from the registration page. Visitors should have one obvious next step.
Answer the common questions on the page. Add a short FAQ below the form covering refunds and transfers, what the ticket includes, accessibility and how to get there. Questions answered on the page are questions that don’t reach your inbox.
Show why people can trust the form. A short note on data protection near the form helps cautious buyers. Gevme is certified to ISO 27001, ISO 27017 and ISO 27018, holds a SOC 2 Type 2 report, and supports GDPR, PDPA and CCPA requirements, with details on the Gevme security page.
Check the page on a phone. Many visitors will open your event page on a phone. If the widget is cramped on a narrow screen, give it a full-width section of its own.
Common Problems and Quick Fixes
| Problem | Likely cause | Fix |
|---|---|---|
| Nothing appears where the widget should be | Your website editor removed or blocked the script | Use the iFrame embed type instead |
| The iFrame is cut off or shows a scroll bar | The frame height is too small for the form | Increase the height value in the iFrame code |
| A ticket is missing from the widget | The ticket is outside its sales dates, sold out, or set to hidden | Check the ticket’s sales period, quantity and visibility in Gevme |
| Registrations show no campaign source | Links to the page have no UTM parameters | Add UTM tags to every link and check the stored source values on the order |
| The widget looks cramped on mobile | It sits inside a narrow column or sidebar | Move it into a full-width section |
| Visitors register twice | No unique-value field on the form | Make email a unique-value field to block duplicates |
Real Events, Real Registration Volume
Embedded or hosted, the registration behind the form has to hold up under real volume. NRF 2025 Retail’s Big Show Asia Pacific ran registration for 9,500 attendees on Gevme, with multi-tier ticketing, add-ons and a CRM integration. For conferences with several ticket types and add-ons, the same registration setup works whether visitors sign up on your website or on a Gevme-hosted page.
For a wider look at moving the whole registration journey online, see our guide to online event registration software.
A Few Terms Worth Knowing
- Embed code: a short snippet of code you copy from a platform and paste into your website to display that platform’s content on your page.
- iFrame: an HTML element that shows one web page inside a frame on another page.
- UTM parameters: tags added to the end of a link that tell your analytics where a visitor came from, such as a newsletter or a paid ad.
- Data layer: a piece of code on a page that passes information, such as a completed registration, to your tag manager and analytics tools.
Pro Tip
Keep two routes to registration live at the same time: the embedded form on your website and a plain text link to the registration page for emails, social posts and partners. Tag each one with its own UTM source. After the first two weeks of sales, compare where registrations actually came from, and put your promotion effort behind the route that performs best.
Frequently Asked Questions
Yes. Gevme Registration lets you embed a tickets widget on any page of your website by copying a script or iFrame code from the Website Integration section and pasting it into your page. You can also add a registration button, a text link or a calendar widget of upcoming events.
An embedded form is better when you have an established website, run regular events or need strict brand consistency. A hosted landing page is better when you need to go live quickly, don’t have website access, or your site blocks embedded code. Many organisers use both.
Use the script embed if your website allows custom JavaScript, since it fits into the page flow. Use the iFrame embed if your website builder strips scripts, or if the widget doesn’t appear after you publish the page.
Yes. The tickets widget lists the tickets on sale in Gevme, so when you change a ticket, hide it, or its sales period ends, the widget reflects that without you changing the code on your website.
Copy the embed code from Website Integration in Gevme Registration, open your page in the WordPress editor, add a Custom HTML block and paste the code into it. Preview the page, publish it, then run a test registration to confirm everything works.
Yes. Gevme Registration integrates with Google Analytics and Google Tag Manager, stores UTM and source values with every order, and provides a confirmation page data layer so completed registrations can be counted as conversions.
Yes. The calendar widget displays your upcoming events on one page so visitors can browse them and choose which to register for. It suits associations, universities and training providers with a regular programme of events.
Conclusion: Keep Registration Where Your Visitors Already Are
If your website already does the work of explaining and promoting your event, an embedded registration form lets it finish the job. Visitors stay on your branded page from the first click to the confirmation email, and the data still lands in one registration system. Pick the hosted page when speed or website access is the constraint, and run both side by side when you want to compare channels.
Gevme Registration gives you every option on one screen: a tickets widget in script or iFrame form, a styled button, a text link and a calendar widget, backed by ticketing, payments, confirmation emails and conversion tracking. To see how it would fit on your own website, request a demo and the Gevme team will walk you through the setup.